Дом > Новости > «Помощь ранены в KCD2: Guide Guid Guid Guid Guide»

«Помощь ранены в KCD2: Guide Guid Guid Guid Guide»

By NoahMay 01,2025

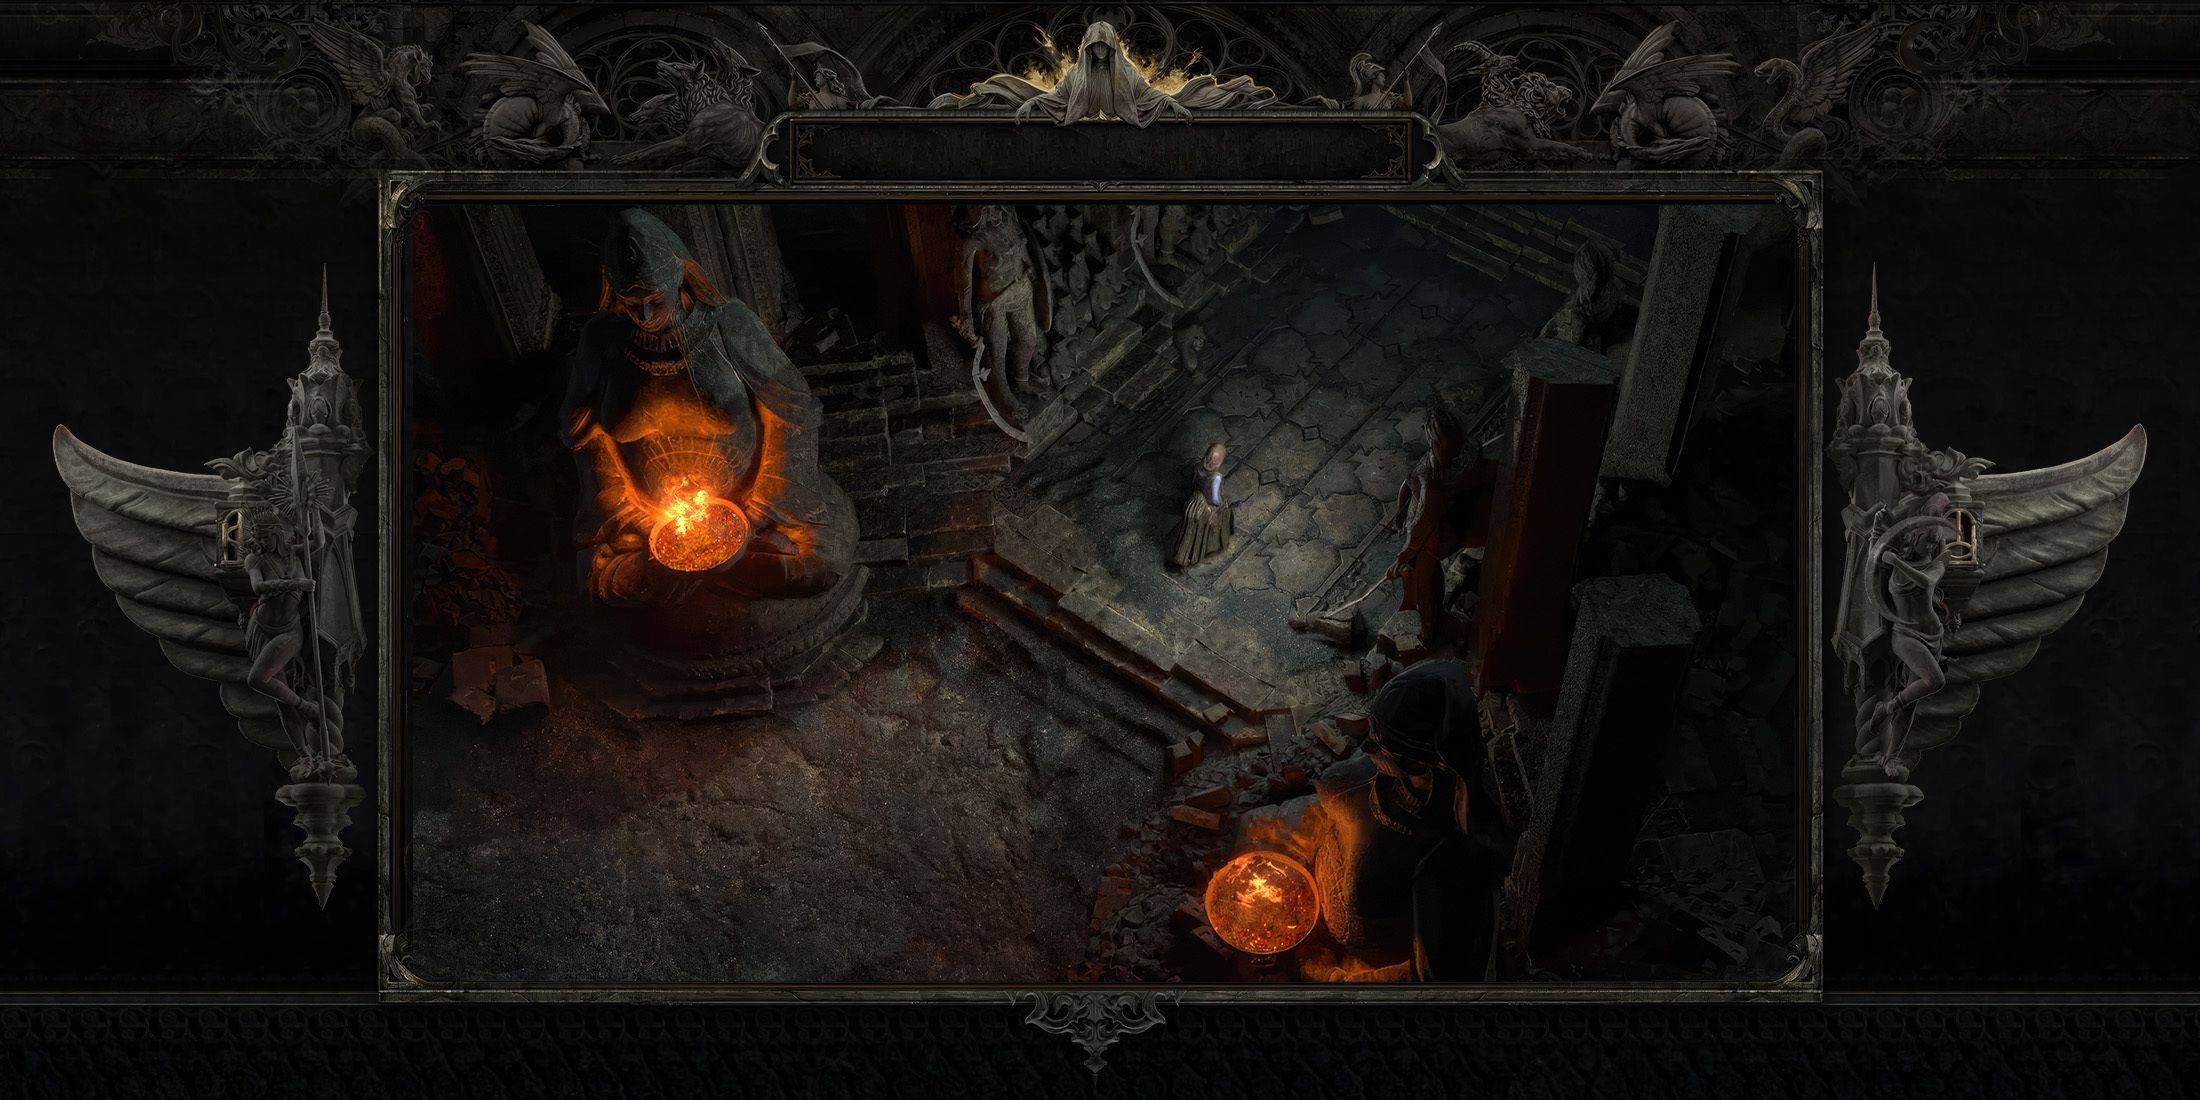
В *Королевство приходит: освобождение 2 *, последствия бурных событий в Крепости Небакова во время необходимого злого квеста представляют игрокам критическое решение между сайдированием с Семине или Хашеком. После этого, квест пальца Бога дает возможность помочь раненым, что также может повлиять на ваши романтические перспективы с Кларой. Вот подробное руководство о том, как эффективно лечить раненых.

Прежде чем начать, целесообразно проконсультироваться с Кларой. Она может предоставить бесценные советы по управлению конкретными симптомами и где найти необходимые расходные материалы. Обязательно собирайте все необходимые предметы из дома Клары, прежде чем начать лечение.

Как лечить Козлика

Чтобы успешно лечить Козлика, выполните эти шаги:

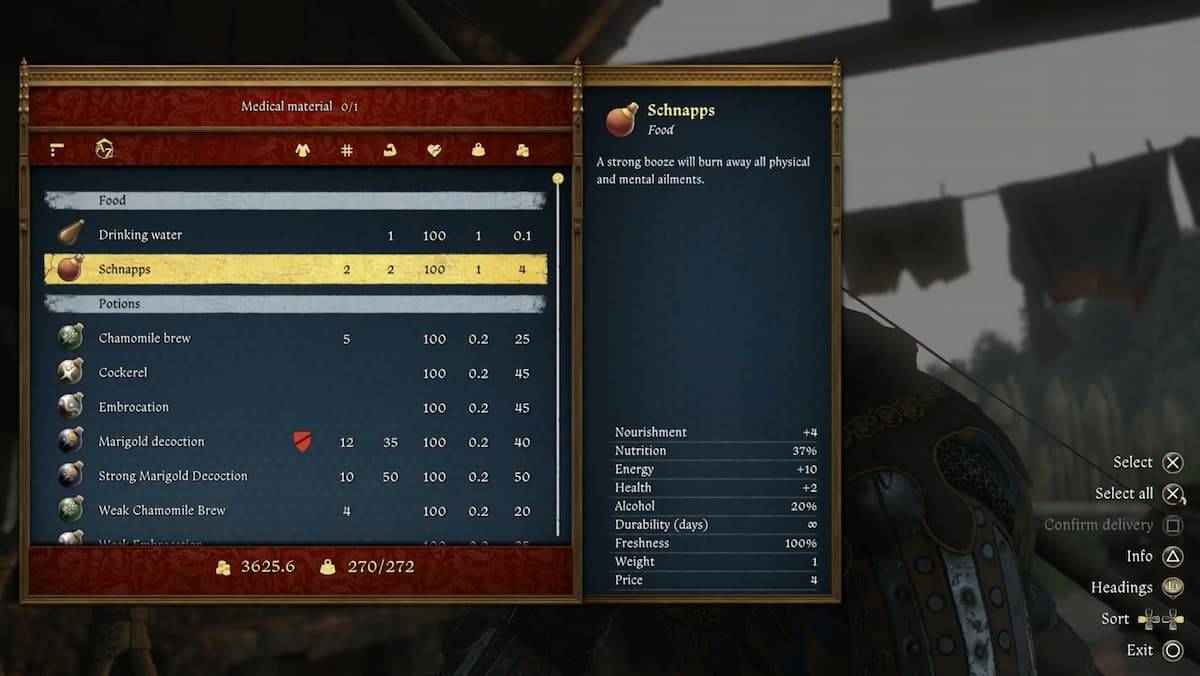
  • Очистите рану, используя воду или шнапс.
  • Прижигайте рану, чтобы остановить любое кровотечение.
  • Измените повязку, чтобы держать область в чистоте и способствовать исцелению.
  • Вводить тоник лихорадки, чтобы помочь справиться с температурой и предотвратить инфекцию.

Как лечить марку

Марк, расположенный рядом с Козликом, требует следующего лечения:

  • Очистите свою рану шнапсом, гарантируя, что он не бодрствует на протяжении всего процесса.
  • Осадить рану правильно, чтобы защитить ее от дальнейшего вреда.
  • Дайте ему обезболивающий варень, чтобы облегчить его дискомфорт.

Марк в Королевстве Приходите: Освобождение 2

Как лечить Zwerk

Для Zwerk выполните следующие шаги:

  • Очистите рану шнапсами, чтобы дезинфицировать ее.
  • Шейте рану, чтобы эффективно закрыть ее.
  • Оставьте рану, чтобы помочь в выздоровлении.
  • Нанесите ромашник на рану, чтобы способствовать заживлению.
  • Предложите ему алкогольный напиток, чтобы помочь с управлением болью.

После того, как вы лечите всех трех человек, поговорите с Кларой, чтобы подтвердить, что Козлик, Марк и Зверк находятся на пути к полному выздоровлению. Успешно завершить эту часть пальца Бога, квест не только помогает раненым, но также может усилить ваши отношения с Кларой.

Для получения дополнительной информации и советов о *Королевстве приходите: освобождение 2 *, включая варианты романтики и стратегии для достижения наилучшего финала, обязательно посетите Escapist.

Предыдущая статья:Construction Simulator 4: мастер-строитель с Expert советами Следующая статья:Dying Light: The Beast – 5 Tips for Surviving Castor Woods | IGN First As Dying Light: The Beast dives deeper into the dark heart of Castor Woods, players are thrust into one of the most dangerous and atmospheric zones yet in the Dying Light universe. With new biome hazards, aggressive enemies, and a relentless threat that stalks you at night, surviving here demands more than just parkour and melee combat. Here are five essential tips to help you stay alive and thrive in Castor Woods: 1. Master the Terrain – Use the Forest to Your Advantage Castor Woods is dense, overgrown, and full of verticality. Unlike the open cityscapes of Harran, here the trees, collapsed buildings, and tangled undergrowth offer natural cover — but they also obscure your vision and can hide enemies. Stay on high ground when possible. Use rooftops, old watchtowers, and wooden platforms to scout ahead. Avoid open clearings at night. The Beast and other creatures move faster and are more aggressive in open areas. Use the environment to ambush: Drop down from trees to surprise enemies, or set traps in narrow pathways. 2. Know the Beast’s Patterns – Hunt It, Don’t Run From It The Beast isn’t just a random threat — it follows predictable hunting patterns. Learn them to survive. The Beast only emerges at night. Stay in safe zones (marked by flares or barricaded buildings) during darkness. It tracks sound and movement. Avoid running, clattering metal, or loud gunfire at night. Use noise to your advantage: Lure it into traps or narrow alleys, then take it down using environmental hazards like gas tanks or collapsing structures. 3. Stock Up on Upgrades and Medic Castor Woods is harsher than any zone before — your gear won’t last long if you’re not prepared. Always carry at least 3–4 med kits and 10+ adrenaline syringes. You’ll need them for stamina recovery during chases. Upgrade your weapons early: Use scavenged materials to improve your melee and ranged weapons. Focus on firearms that deal high damage to large, armored enemies. Keep your backpack light but efficient. Prioritize healing items, flares, and throwable gadgets (like flashbangs and smoke bombs). 4. Use Flares and Light Strategically Light is both a blessing and a curse in Castor Woods. Flares keep you safe from the Beast — but they also attract it. Use flares only when you’re in a secure location (e.g., inside a bunker or under a reinforced structure). Avoid carrying flares at night unless you’re ready to fight. Instead, rely on your flashlight and sound-based stealth. 5. Exploit the Day-Night Cycle for Tactical Advantage The weather and time of day affect enemy behavior and visibility. Daytime is your best time to explore and scavenge. Most enemies are slower and less aggressive. Nighttime is for survival and strategy. Use darkness to hide, but stay alert — the Beast hunts with precision. Plan your missions: Complete objectives during the day, then hole up in fortified areas to survive the night. Final Word: Castor Woods isn’t just another zone — it’s a living, breathing predator. Respect its dangers, master its rhythms, and use every tool at your disposal. With patience, preparation, and cunning, you can not only survive… but dominate the Beast. "In the woods, you don’t outrun the dark. You learn to walk through it." — Dying Light: The Beast – IGN First Stay sharp. Stay silent. And above all — stay alive.