Дом > Новости > "Разблокируйте бесплатный металлоискатель в Atomfall рано: гид"

"Разблокируйте бесплатный металлоискатель в Atomfall рано: гид"

By RileyMay 14,2025

При погружении в мир *Atomfall *, обеспечение лучших инструментов может значительно улучшить ваш опыт выживания и исследования. Ключевым инструментом для получения в руки является металлоискатель, который имеет решающее значение для поиска ценных предметов для использования или торговли. Вот как вы можете получить его бесплатно в начале вашего путешествия.

Как детектор металла работает при атомепаде

Индикация детектора металлов при атомном падении Скриншот от Escapist

Детектор металла является бесценным инструментом в * Atomfall *, который вы захотите сохранить любой ценой. Это помогает вам найти металлические кэши, заполненные полезными предметами, распространяющиеся по всему обширному открытому миру игры.

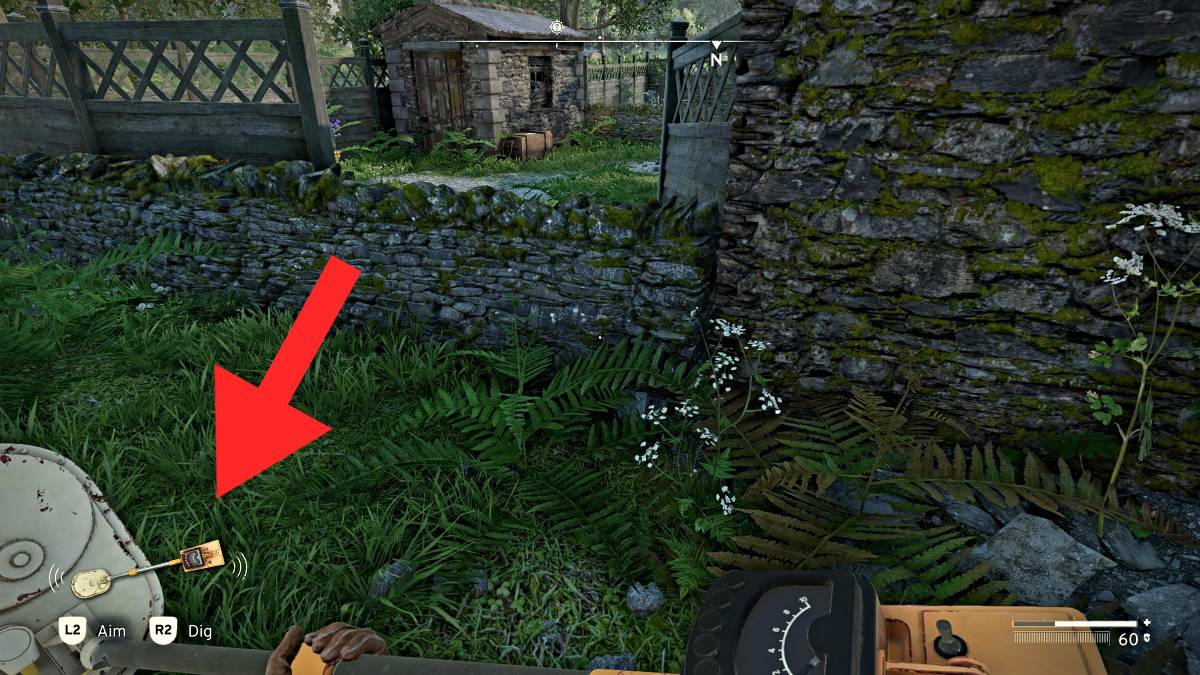
Когда вы исследуете, следите за нижним левым углом экрана для пинга от металлоискателя, обозначенного значком инструмента. Когда вы видите это, если это безопасно, вытащите металлический детектор, используя назначенную горячую клавишу.

Детектор имеет ряд огней, которые направляют вас к скрытому кешу. Если свет движется влево, поверните налево; Если он сдвигается вправо, поверните направо. Ваша цель состоит в том, чтобы следовать центральному свету, пока циферблат под светом не достигнет самой высокой частоты (10).

Кэш детектора металлов при атомепаде Скриншот от Escapist

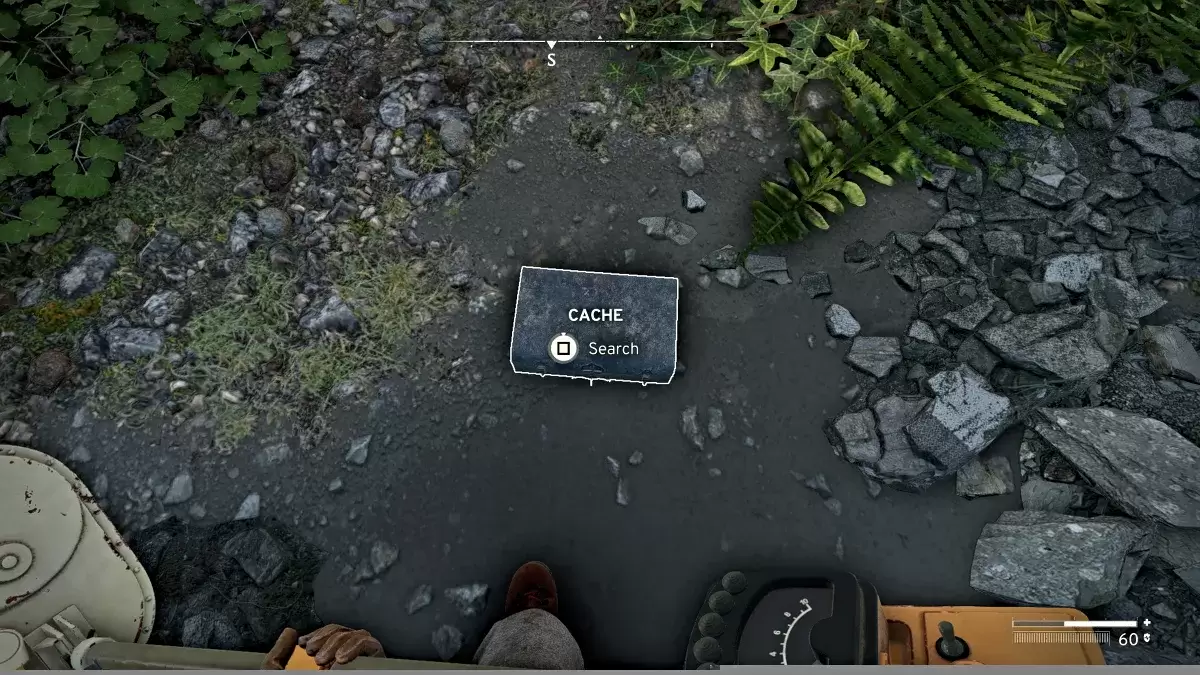
Как только все огни мигают одновременно, вы определили точное местоположение кэша. Используйте опцию «Dig», чтобы выявить кэш, затем «поиск», чтобы претендовать на элементы внутри.

Где найти свободный детектор металлов на ранних этапах атома

Труп со свободным металлоискателем в атомепаде Скриншот от Escapist

В ваши первые часы изучения *Atomfall *вы столкнетесь с трейдером NPC, желающих обменять. Рег Стэнсфилд в пещерах Slate Mine в Slatten Dale предлагает металл -детектор, но, вероятно, на ранних этапах вашего бюджета.

Вместо этого направляйтесь на восток к правой стороне Slatten Dale. Пройдите мимо соединения «водяных колес», зачитываясь с преступниками, чтобы свести к минимуму ранний бой.

Бесплатное расположение детектора металлов в атомном падении Скриншот от Escapist

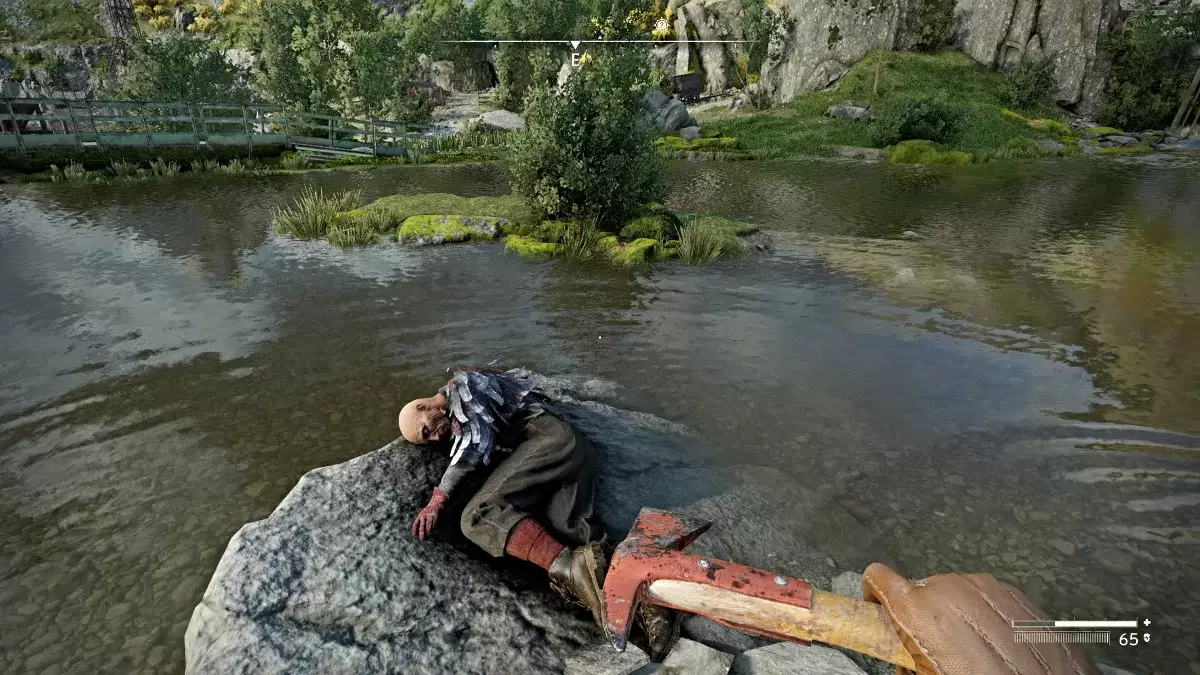
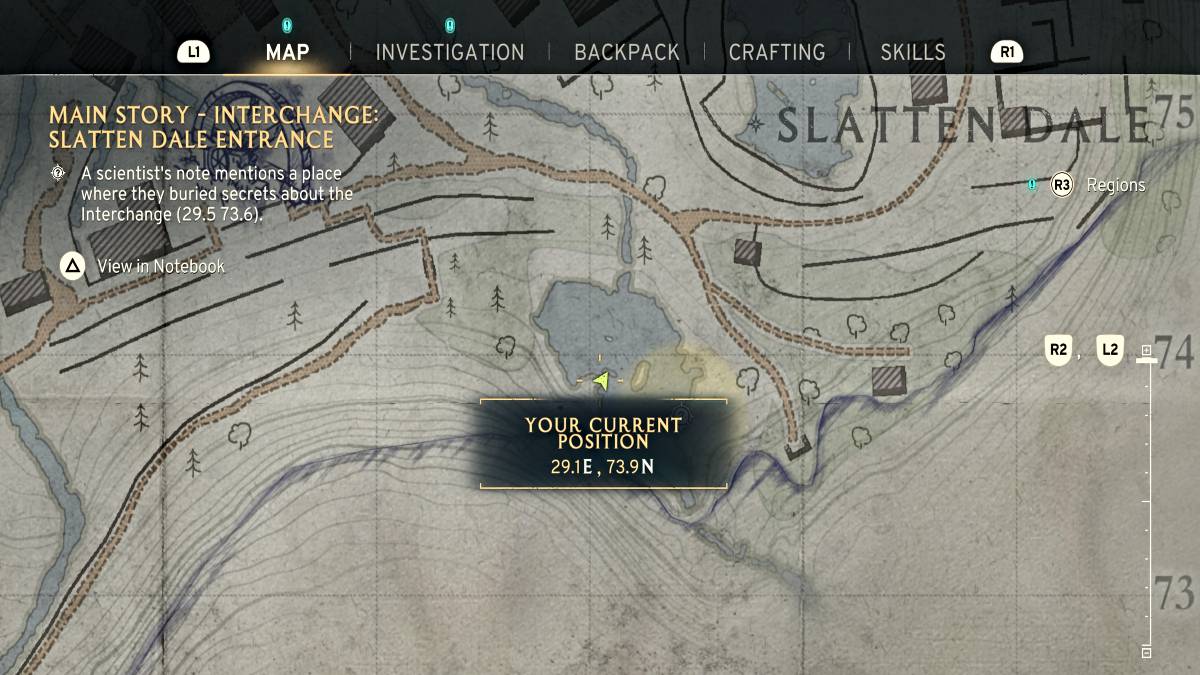
Продолжайте восток, затем на юг, пока не достигнете мелкого пруда в координатах ** (29.1e, 73.9n) **. Поищите труп Outlaw на скалистых обнажениях в центре пруда. Будьте осторожны с плотоядными пиявками в воде, которые могут причинить вам вред, если вы останетесь слишком долго.

Подходите к трупу и «поищите», чтобы получить функциональный детектор металла бесплатно. Это раннее приобретение приносит вам ** детекторист -трофей/достижение **. На этом этапе наличие металлоискателя дает вам значительное преимущество в поиске свободных предметов заживления, боеприпасов и другой добычи, полезной для бартера.

Это также может помочь разблокировать дополнительные трофеи/достижения, такие как ** «где есть много латуни» ** (найдите 10 кэша детектора металла) и ** 'упакованный обед' ** (найдите 5 похороненных ланч -боксов).

Это завершает, как обеспечить бесплатный металлоискатель в начале *Atomfall *, настроив вас на успешное приключение.

Предыдущая статья:Construction Simulator 4: мастер-строитель с Expert советами Следующая статья:Dying Light: The Beast – 5 Tips for Surviving Castor Woods | IGN First As Dying Light: The Beast dives deeper into the dark heart of Castor Woods, players are thrust into one of the most dangerous and atmospheric zones yet in the Dying Light universe. With new biome hazards, aggressive enemies, and a relentless threat that stalks you at night, surviving here demands more than just parkour and melee combat. Here are five essential tips to help you stay alive and thrive in Castor Woods: 1. Master the Terrain – Use the Forest to Your Advantage Castor Woods is dense, overgrown, and full of verticality. Unlike the open cityscapes of Harran, here the trees, collapsed buildings, and tangled undergrowth offer natural cover — but they also obscure your vision and can hide enemies. Stay on high ground when possible. Use rooftops, old watchtowers, and wooden platforms to scout ahead. Avoid open clearings at night. The Beast and other creatures move faster and are more aggressive in open areas. Use the environment to ambush: Drop down from trees to surprise enemies, or set traps in narrow pathways. 2. Know the Beast’s Patterns – Hunt It, Don’t Run From It The Beast isn’t just a random threat — it follows predictable hunting patterns. Learn them to survive. The Beast only emerges at night. Stay in safe zones (marked by flares or barricaded buildings) during darkness. It tracks sound and movement. Avoid running, clattering metal, or loud gunfire at night. Use noise to your advantage: Lure it into traps or narrow alleys, then take it down using environmental hazards like gas tanks or collapsing structures. 3. Stock Up on Upgrades and Medic Castor Woods is harsher than any zone before — your gear won’t last long if you’re not prepared. Always carry at least 3–4 med kits and 10+ adrenaline syringes. You’ll need them for stamina recovery during chases. Upgrade your weapons early: Use scavenged materials to improve your melee and ranged weapons. Focus on firearms that deal high damage to large, armored enemies. Keep your backpack light but efficient. Prioritize healing items, flares, and throwable gadgets (like flashbangs and smoke bombs). 4. Use Flares and Light Strategically Light is both a blessing and a curse in Castor Woods. Flares keep you safe from the Beast — but they also attract it. Use flares only when you’re in a secure location (e.g., inside a bunker or under a reinforced structure). Avoid carrying flares at night unless you’re ready to fight. Instead, rely on your flashlight and sound-based stealth. 5. Exploit the Day-Night Cycle for Tactical Advantage The weather and time of day affect enemy behavior and visibility. Daytime is your best time to explore and scavenge. Most enemies are slower and less aggressive. Nighttime is for survival and strategy. Use darkness to hide, but stay alert — the Beast hunts with precision. Plan your missions: Complete objectives during the day, then hole up in fortified areas to survive the night. Final Word: Castor Woods isn’t just another zone — it’s a living, breathing predator. Respect its dangers, master its rhythms, and use every tool at your disposal. With patience, preparation, and cunning, you can not only survive… but dominate the Beast. "In the woods, you don’t outrun the dark. You learn to walk through it." — Dying Light: The Beast – IGN First Stay sharp. Stay silent. And above all — stay alive.