Дом > Новости > Грозовые волны: расположение сундуков с сокровищами в гавани Шепчущего Ветра

Грозовые волны: расположение сундуков с сокровищами в гавани Шепчущего Ветра

By HazelJan 08,2025

Грозовые волны: расположение сундуков с сокровищами в гавани Шепчущего Ветра

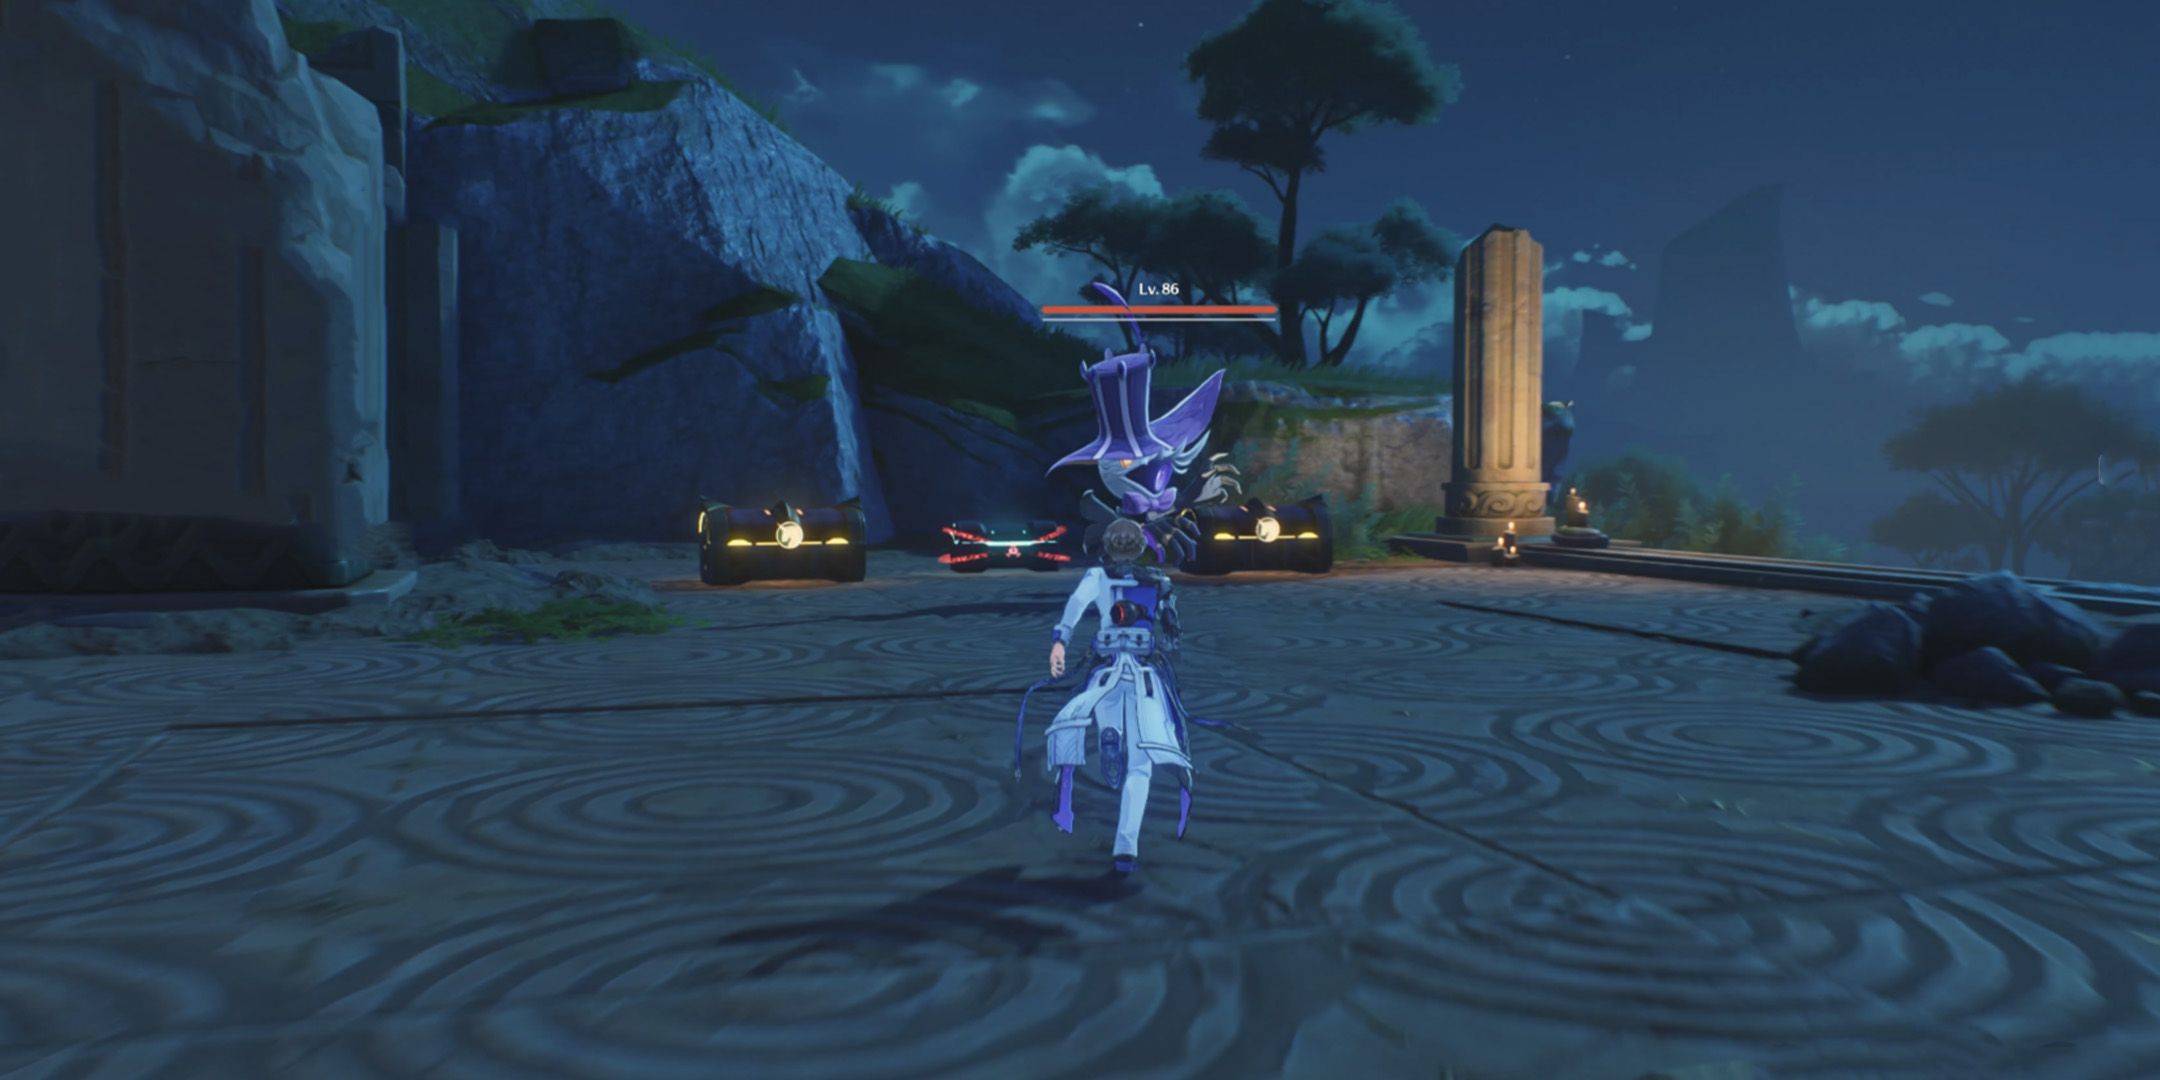
Найдите спрятанные сокровища Ринаскиты в Грозовых волнах! В этом руководстве рассказывается о местонахождении всех пяти мест с сокровищами в Гавани Шепчущего Ветра, наполненных сундуками с припасами. Исследуйте потаенные уголки, решайте загадки окружающей среды и побеждайте врагов, чтобы получить награды.

Помните, что вы можете использовать функцию обнаружения внутриигровой карты, чтобы найти места с сокровищами, но вам придется находить сундуки в радиусе каждого места самостоятельно.

Местоположения сокровищ Гавани Шепчущего Ветра:

Каждая локация содержит определенное количество сундуков в определенной области (отмечена желтым кружком на карте).

Место сокровищ №1 (северо-восток города Эгла):

В этом месте находятся три сундука. Маршрут включает в себя исследование ящиков, восхождение на небольшую башню, перемещение по крышам зданий и осмотр района Безумного Рыцаря.

Место сокровищ №2 (юго-западный город Эгла):

Ждут пять сундуков! Начните с телепортации к резонансному маяку города Эгла. Победите плюшевое эхо, обыщите небольшую палатку, заберитесь на платформы и используйте эхо-испытание «Плюшевый прыжок», чтобы добраться до более высоких мест.

Место сокровищ №3 (к югу от ветряных мельниц Полифема):

Здесь спрятаны четыре сундука. Начните с северного Резонансного Маяка. Забирайтесь на башни, исследуйте изогнутые стены и побеждайте больше плюшевых эхо, чтобы забрать свою добычу.

Место сокровищ №4 (Ветряные мельницы Полифема):

В этом месте также есть четыре сундука. Побеждайте группы плюшевых плюшек, поднимайтесь на башни и снова используйте эхо-испытание «Плюшевый прыжок», чтобы достичь самой высокой точки и найти шкатулку Сонанса.

Место сокровищ №5 (северо-восточная роща Серебряной Луны):

В этом последнем месте находятся четыре сундука. Телепортируйтесь в Резонансный узел Рощи Серебряной Луны. Исследуйте территорию возле постамента Меча Щедрости, поднимайтесь по лестнице, побеждайте врагов и в последний раз используйте эхо-испытание «Плюшевый прыжок».

Отправьтесь на поиски сокровищ и обогатите свое приключение в «Грозовых волнах»!

Предыдущая статья:Construction Simulator 4: мастер-строитель с Expert советами Следующая статья:Dying Light: The Beast – 5 Tips for Surviving Castor Woods | IGN First As Dying Light: The Beast dives deeper into the dark heart of Castor Woods, players are thrust into one of the most dangerous and atmospheric zones yet in the Dying Light universe. With new biome hazards, aggressive enemies, and a relentless threat that stalks you at night, surviving here demands more than just parkour and melee combat. Here are five essential tips to help you stay alive and thrive in Castor Woods: 1. Master the Terrain – Use the Forest to Your Advantage Castor Woods is dense, overgrown, and full of verticality. Unlike the open cityscapes of Harran, here the trees, collapsed buildings, and tangled undergrowth offer natural cover — but they also obscure your vision and can hide enemies. Stay on high ground when possible. Use rooftops, old watchtowers, and wooden platforms to scout ahead. Avoid open clearings at night. The Beast and other creatures move faster and are more aggressive in open areas. Use the environment to ambush: Drop down from trees to surprise enemies, or set traps in narrow pathways. 2. Know the Beast’s Patterns – Hunt It, Don’t Run From It The Beast isn’t just a random threat — it follows predictable hunting patterns. Learn them to survive. The Beast only emerges at night. Stay in safe zones (marked by flares or barricaded buildings) during darkness. It tracks sound and movement. Avoid running, clattering metal, or loud gunfire at night. Use noise to your advantage: Lure it into traps or narrow alleys, then take it down using environmental hazards like gas tanks or collapsing structures. 3. Stock Up on Upgrades and Medic Castor Woods is harsher than any zone before — your gear won’t last long if you’re not prepared. Always carry at least 3–4 med kits and 10+ adrenaline syringes. You’ll need them for stamina recovery during chases. Upgrade your weapons early: Use scavenged materials to improve your melee and ranged weapons. Focus on firearms that deal high damage to large, armored enemies. Keep your backpack light but efficient. Prioritize healing items, flares, and throwable gadgets (like flashbangs and smoke bombs). 4. Use Flares and Light Strategically Light is both a blessing and a curse in Castor Woods. Flares keep you safe from the Beast — but they also attract it. Use flares only when you’re in a secure location (e.g., inside a bunker or under a reinforced structure). Avoid carrying flares at night unless you’re ready to fight. Instead, rely on your flashlight and sound-based stealth. 5. Exploit the Day-Night Cycle for Tactical Advantage The weather and time of day affect enemy behavior and visibility. Daytime is your best time to explore and scavenge. Most enemies are slower and less aggressive. Nighttime is for survival and strategy. Use darkness to hide, but stay alert — the Beast hunts with precision. Plan your missions: Complete objectives during the day, then hole up in fortified areas to survive the night. Final Word: Castor Woods isn’t just another zone — it’s a living, breathing predator. Respect its dangers, master its rhythms, and use every tool at your disposal. With patience, preparation, and cunning, you can not only survive… but dominate the Beast. "In the woods, you don’t outrun the dark. You learn to walk through it." — Dying Light: The Beast – IGN First Stay sharp. Stay silent. And above all — stay alive.