Animal Crossing: Pocket Camp Полное руководство по перекусам: максимально увеличьте уровень дружбы
Это руководство охватывает все, что вам нужно знать о закусках в Animal Crossing: Pocket Camp Complete, от их получения до стратегического использования их для boost уровней дружбы и ускорения вашего прогресса на уровне менеджера лагеря.
Приготовление закусок: подробное руководство
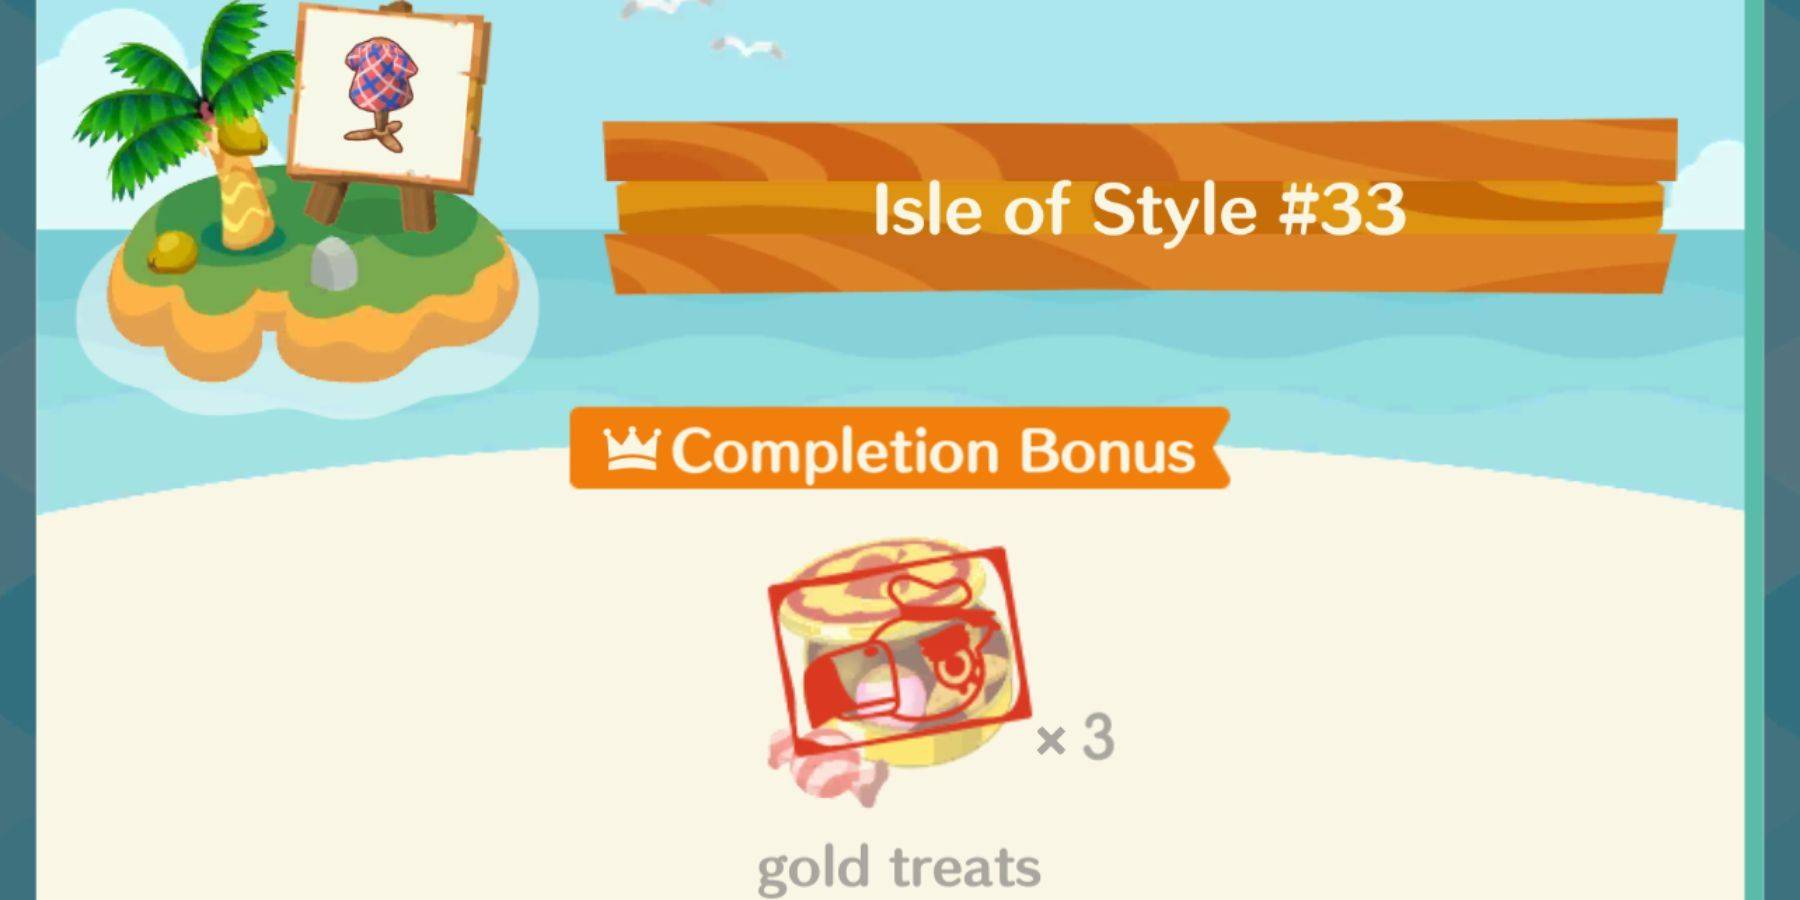
Самый надежный способ приобретения закусок — через Корабль Гулливера. Отправка Гулливера на специальные «золотые острова» (обозначенные на картах деревенских жителей) дает значительные награды за закуски. За прохождение особого острова вы получите в качестве бонуса 20 золотых угощений. Если вы уже собрали все карты деревенских жителей, сосредоточьтесь на островах «Острова стиля», чтобы получить гарантированные 3 золотых угощения за каждый сувенир и еще 3 в качестве бонуса за завершение.
Помните, что вы можете видеть только три острова одновременно и получать одно бесплатное обновление в день. Для корабля Гулливера требуется груз, который можно изготовить в вашем каталоге мебели. Например, на Экзотическом острове можно найти закуски в современном стиле и принять простые упаковки, простые ящики или мебель в экзотическом стиле (например, экзотические коврики). Более длительные экспедиции (6 часов) обычно приносят больше удовольствия, чем более короткие (4 часа или меньше). Например, на острове Пиано есть все варианты пирогов.
Помимо Гулливера, закуски можно получить через:
- Запросы: Выполнение запросов с редкими предметами часто дает бронзовые, серебряные или золотые угощения.
- Подарки для посетителей: Посетители вашего кемпинга/хижины могут иногда преподносить вам закуски.
- Ежедневные цели: Проверьте свои ежедневные цели, чтобы получить серебряные и золотые награды.
- Путешествие за сокровищами Блазерса: Использование карт деревенских жителей и выбор «Автопутешествия» (стоит 5 жетонов листьев) гарантирует получение бронзовых, серебряных и золотых угощений.
Понимание типов и ценности закусок
Закуски подразделяются на обычные (бронзовые, серебряные и золотые угощения) или тематические. Регулярные перекусы ценятся повсеместно. Тематические закуски делятся на три уровня: «Обычные», «Вкусные» и «Изысканные», причем «Гурман» дает больше всего очков дружбы, а «Обычные» — меньше всего.
Всего существует 36 различных типов закусок:
| Name | Snack Theme | Points (Matching Theme) | Points (Non-Matching Theme) |
|---|---|---|---|
| Plain Waffle | Natural | 2 | 3 |
| Tasty Waffle | Natural | 6 | 9 |
| Gourmet Waffle | Natural | 12 | 18 |
| Plain Donut | Cute | 2 | 3 |
| Tasty Donut | Cute | 6 | 9 |
| Gourmet Donut | Cute | 12 | 18 |
| Plain Popcorn | Sporty | 2 | 3 |
| Tasty Popcorn | Sporty | 6 | 9 |
| Gourmet Popcorn | Sporty | 12 | 18 |
| Plain Chocolate Bar | Cool | 2 | 3 |
| Tasty Chocolate Bars | Cool | 6 | 9 |
| Gourmet Chocolate Bars | Cool | 12 | 18 |
| Plain Cookie | Rustic | 2 | 3 |
| Tasty Cookies | Rustic | 6 | 9 |
| Gourmet Cookies | Rustic | 12 | 18 |
| Plain Lollipop | Hip | 2 | 3 |
| Tasty Lollipop | Hip | 6 | 9 |
| Gourmet Lollipop | Hip | 12 | 18 |
| Plain Custard | Civic | 2 | 3 |
| Tasty Custard | Civic | 6 | 9 |
| Gourmet Custard | Civic | 12 | 18 |
| Cheesecake | Modern | 2 | 3 |
| Tasty Cheesecake | Modern | 6 | 9 |
| Gourmet Cheesecake | Modern | 12 | 18 |
| Plain Pound Cake | Historical | 2 | 3 |
| Tasty Pound Cake | Historical | 6 | 9 |
| Gourmet Pound Cake | Historical | 12 | 18 |
| Plain Manju | Harmonious | 2 | 3 |
| Tasty Manju | Harmonious | 6 | 9 |
| Gourmet Manju | Harmonious | 12 | 18 |
| Plain Tart | Elegant | 2 | 3 |
| Tasty Tart | Elegant | 6 | 9 |
| Gourmet Tart | Elegant | 12 | 18 |
| Bronze Treats | Generic | 3 | 3 |
| Silver Treats | Generic | 10 | 10 |
| Gold Treats | Generic | 25 | 25 |
Максимальное увеличение очков дружбы
Всегда проверяйте тематику животного, прежде чем подарить закуску. Соответствие тем значительно увеличивает очки дружбы. Золотые угощения, будучи универсальными, всегда являются ценным выбором, каждое из которых дает 25 очков. Если дать 10 золотых лакомств животному 1-го уровня, его уровень мгновенно повысится до 15.

Найдите тему животного, коснувшись его значка в вашем кемпинге/хижине или проверив свои контакты или службу доставки посылок Пита, если их нет в вашем лагере. Чтобы дать перекусить, коснитесь животного и выберите «Перекусить!» (выделено красным).
Следуя этому руководству, вы станете мастером закусок, эффективно повышая уровень дружбы и продвигаясь к Animal Crossing: Pocket Camp Complete.
 Последние загрузки
 Downlaod


 Главные новости


![A Father’s Sins – Going to Hell [Ch. 7 Public] By Pixieblink](https://imgs.jzvvv.com/uploads/67/1719578270667eae9eb6a75.jpg)