Странствующие торговцы Валхейма: руководство по локациям и инвентарю
Исследование Валхейма основано на открытии новых биомов и ресурсов для победы над сложными боссами. Путешествие может быть трудным, особенно по Болоту и Горам. К счастью, три торговца предлагают ценные предметы, которые облегчат ваше приключение. Однако их местоположения генерируются процедурно, что затрудняет их поиск. В этом руководстве подробно описано местонахождение и ассортимент каждого продавца.
Нахождение Хальдора (торговца из Шварцвальда)
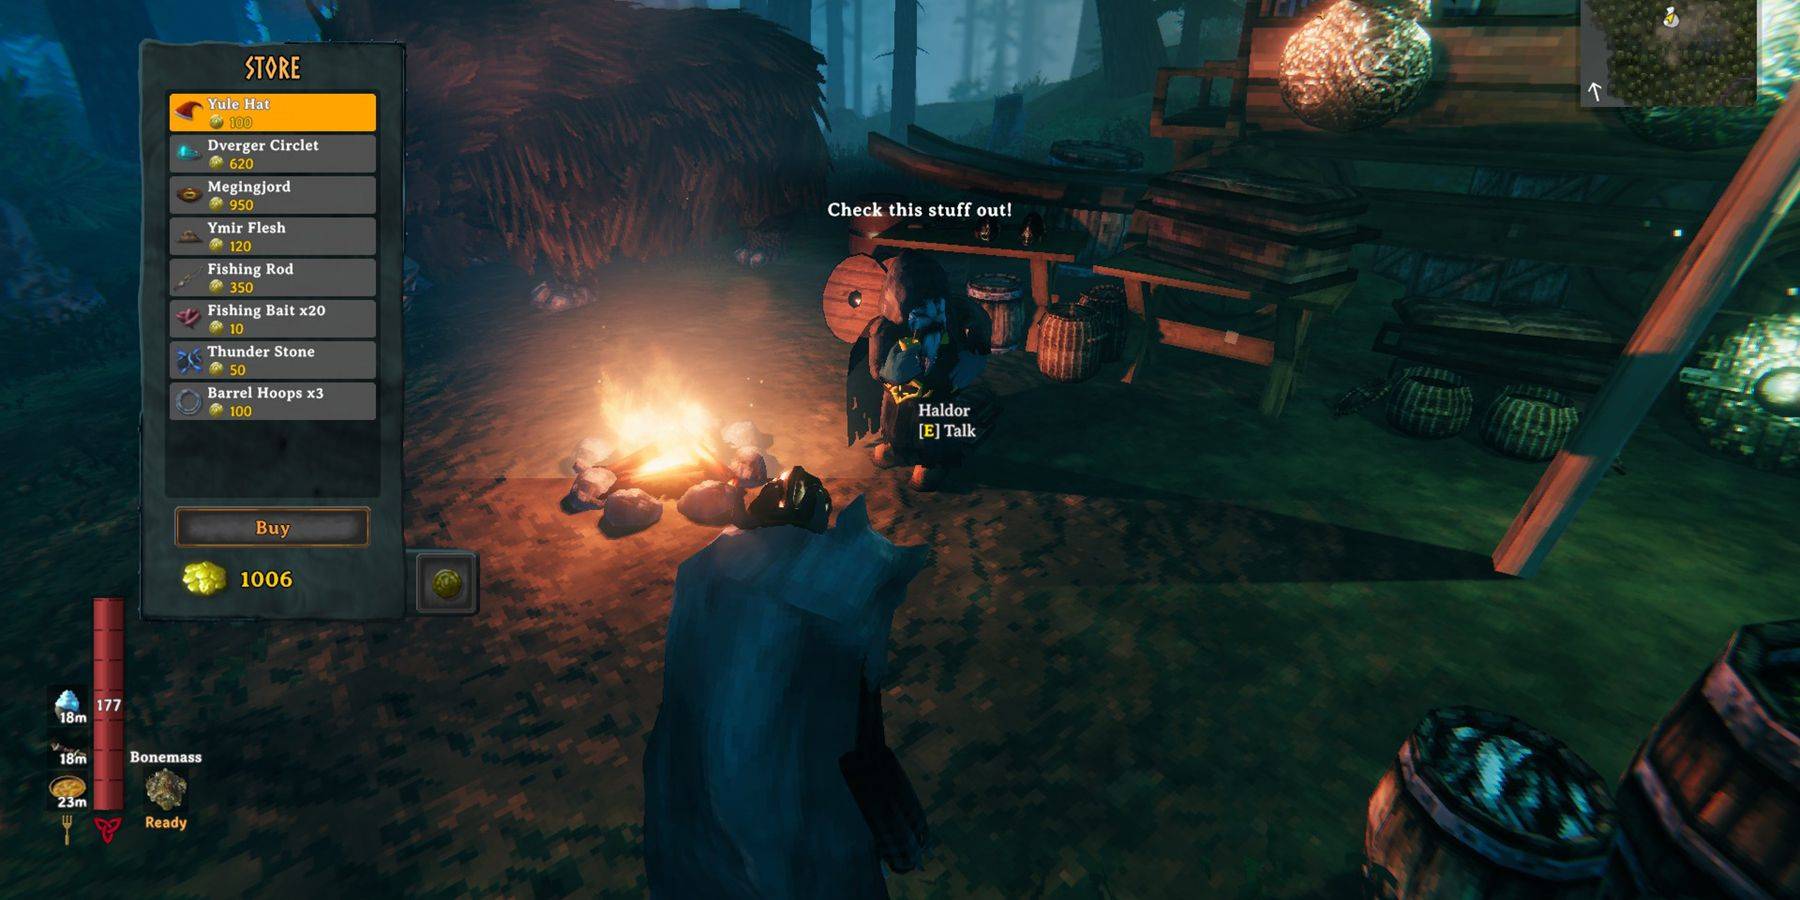 Хальдор, которого зачастую легче всего найти, появляется в пределах 1500 м от центра вашего мира. Он проживает в Шварцвальде, области, доступной в начале игры.
Он часто находится рядом с точкой появления Старейшины (часто на которую указывают светящиеся руины в погребальных камерах). Для более быстрого поиска используйте генератор мира Valheim (созданный wd40bomber7), чтобы определить его точные координаты, используя ваше начальное число мира. Найдя Хальдора, он остается на этом месте. Создайте портал для быстрого доступа. Торгуйте с ним, используя золото, которое можно легко добыть в подземельях и продать драгоценные камни (рубины, янтарные жемчужины, серебряные ожерелья и т. д.).
Инвентарь Хальдора
| Item | Cost | Availability | Use |
|---|---|---|---|
| Yule Hat | 100 | Always | Cosmetic (helmet slot) |
| Dverger Circlet | 620 | Always | Provides light |
| Megingjord | 950 | Always | +150 carry weight |
| Fishing Rod | 350 | Always | Fishing |
| Fishing Bait (20) | 10 | Always | Fishing rod consumable |
| Barrel Hoops (3) | 100 | Always | Barrel crafting material |
| Ymir Flesh | 120 | Post-Elder | Crafting material |
| Thunder Stone | 50 | Post-Elder | Obliterator crafting material |
| Egg | 1500 | Post-Yagluth | Obtain chickens and hens |
В поисках Хильдир (торговец на лугах)
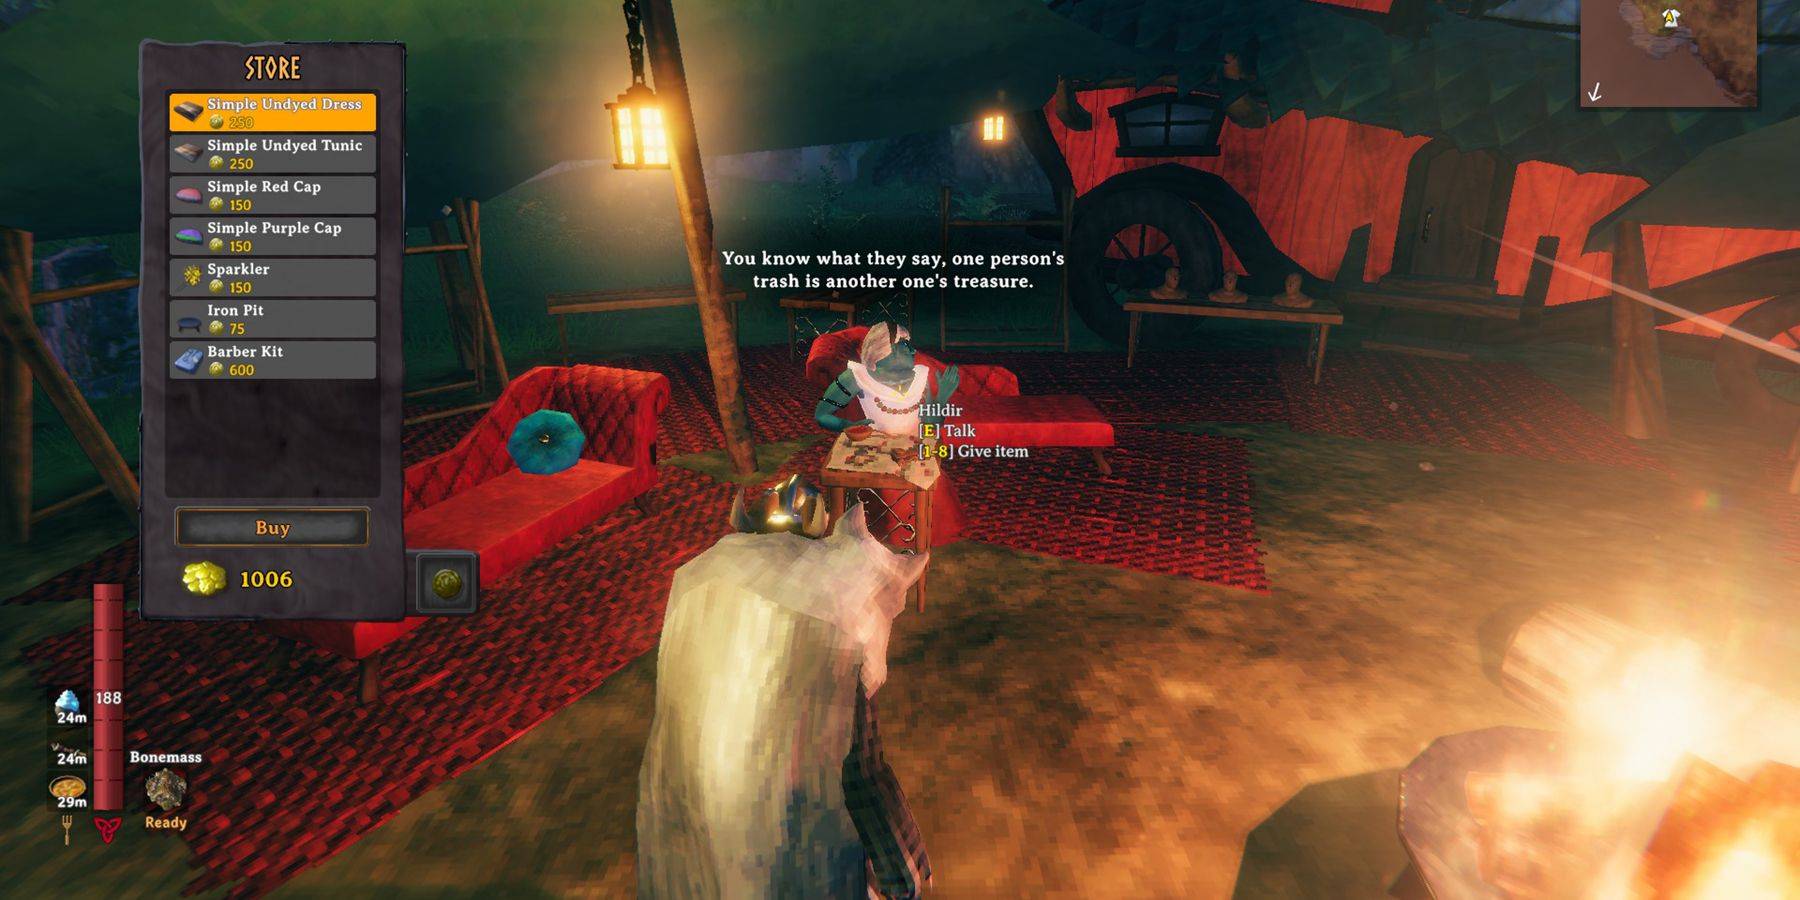 Хильдир, расположенную на Лугах, труднее найти из-за ее удаленного места появления (3000-5100 м от центра мира, точки появления находятся на расстоянии ~ 1000 м друг от друга). Генератор мира Валхейма — ваш лучший выбор, но альтернативой является поиск Медоуза в этом радиусе. Значок футболки появляется на карте, когда вы находитесь на расстоянии ~300-400 метров. Постройте портал, как только найдете.
Хильдир предлагает одежду с различными усилениями и квестами, в которых вы получаете новые предметы после получения ее потерянных сундуков из:
- Тлеющие гробницы (Шварцвальд)
- Воющие пещеры (Горы)
- Запечатанные Башни (Равнины)
Инвентарь Хильдир
| Item | Cost | Availability | Use |
|---|---|---|---|
| Simple Dress Natural | 250 | Always | -20% Stamina use |
| Simple Tunic Natural | 250 | Always | -20% Stamina use |
| ... (Many other items, see original for full list) ... | ... | Various (Always, Post-Chest Retrieval) | See original for details |
В поисках болотной ведьмы (болотный торговец)
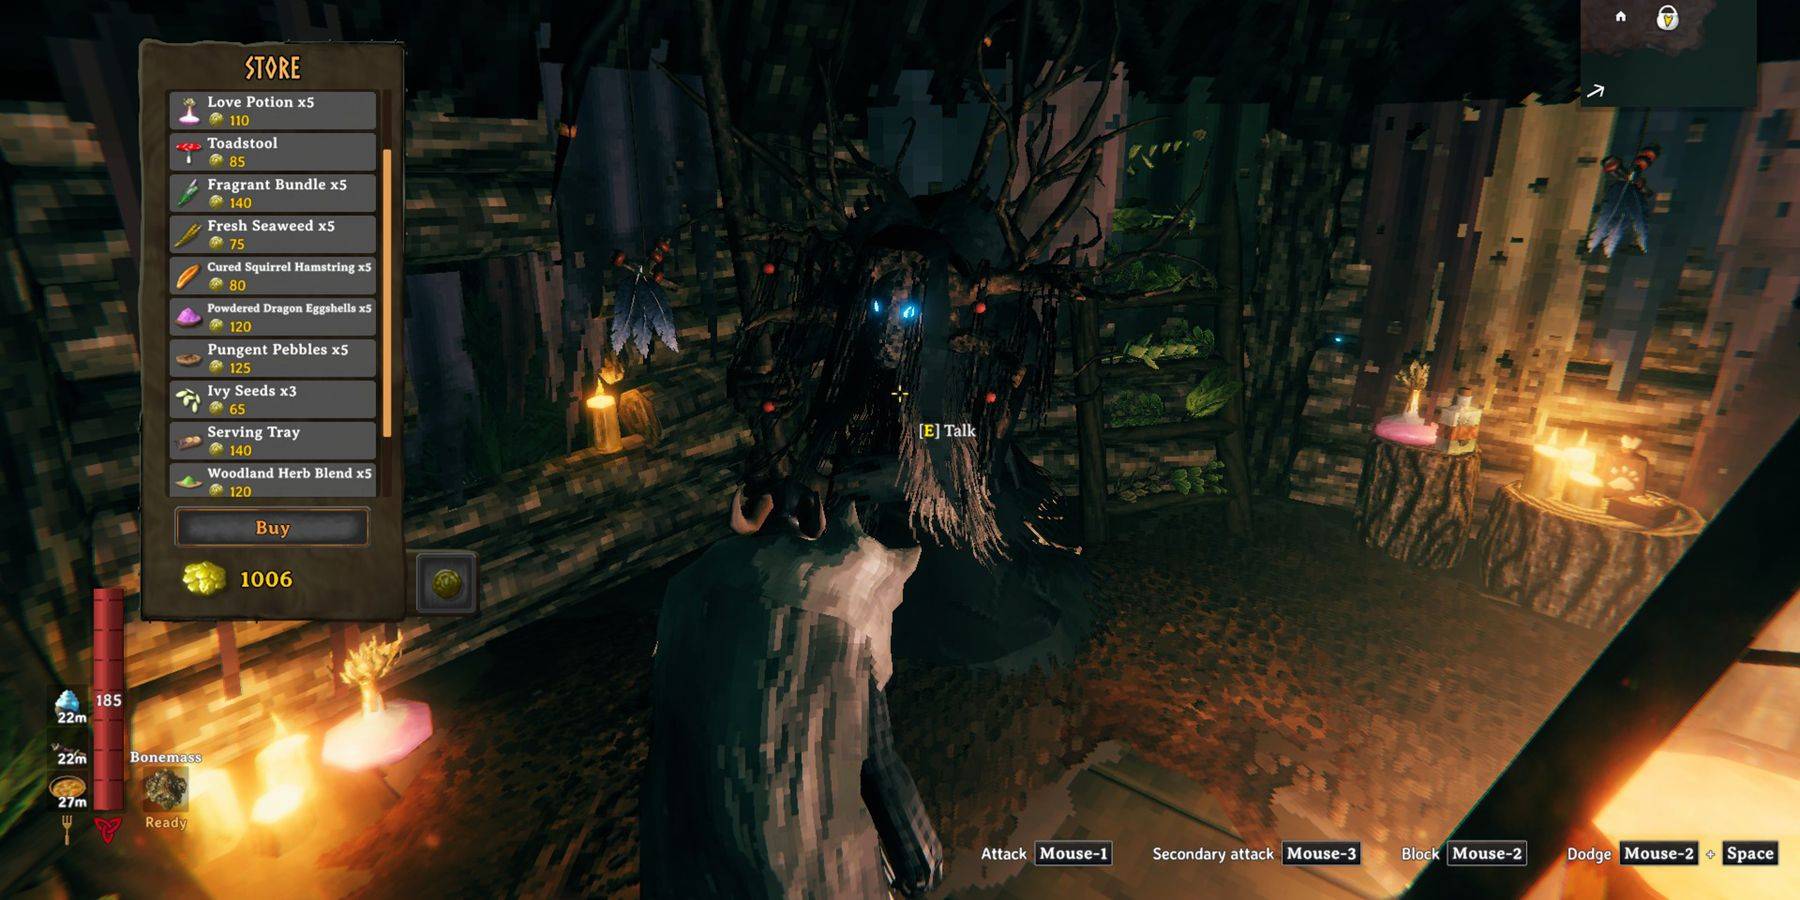 Болотная ведьма, обитающая в Болоте (сложный биом), появляется на расстоянии от 3000 до 8000 метров от центра мира (точки появления находятся на расстоянии примерно 1000 метров друг от друга). Настоятельно рекомендуется использовать World Generator. Рядом появляется значок ее котла. Найдя ее, постройте портал.
Она дружелюбный Грейдварф с волшебным Квастуром, предлагающий уровень комфорта 3 в своей хижине и предметы для новой еды и медовухи.
Инвентарь Болотной Ведьмы
| Item | Cost | Availability | Use |
|---|---|---|---|
| Candle Wick (50) | 100 | Always | Resin Candle crafting material |
| ... (Many other items, see original for full list) ... | ... | Various (Always, Post-Boss Defeat) | See original for details |
Это подробное руководство поможет вам найти торговцев Валхейма и использовать их ценные товары. Не забудьте использовать генератор мира Valheim для эффективного поиска!
 Последние загрузки
 Downlaod


 Главные новости


![A Father’s Sins – Going to Hell [Ch. 7 Public] By Pixieblink](https://imgs.jzvvv.com/uploads/67/1719578270667eae9eb6a75.jpg)